The Windows Snipping Tool offers advanced options for capturing and editing screenshots. With it, you can take a screenshot of the laptop’s whole screen at once, or just one window, or a specific part of the screen.
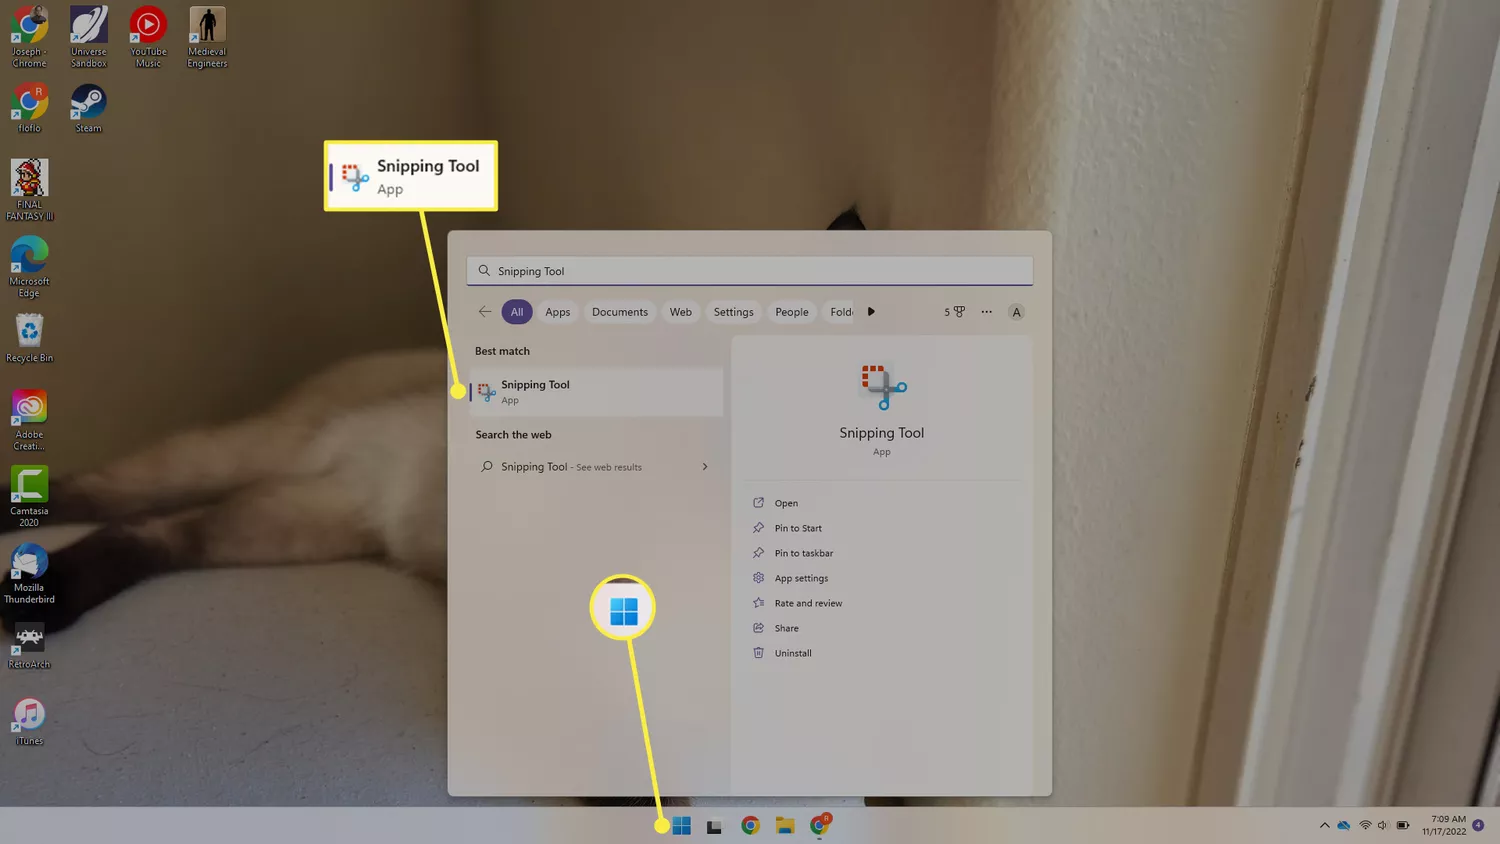
- Open the Start menu, search for Snipping Tool, and select the app to open it.
- Under the Mode menu, choose the type of selection you want to use. To capture the entire screen, choose Full screen. You can also choose a rectangular section, a single window, or draw a custom shape.
- Select New to start your screen capture.

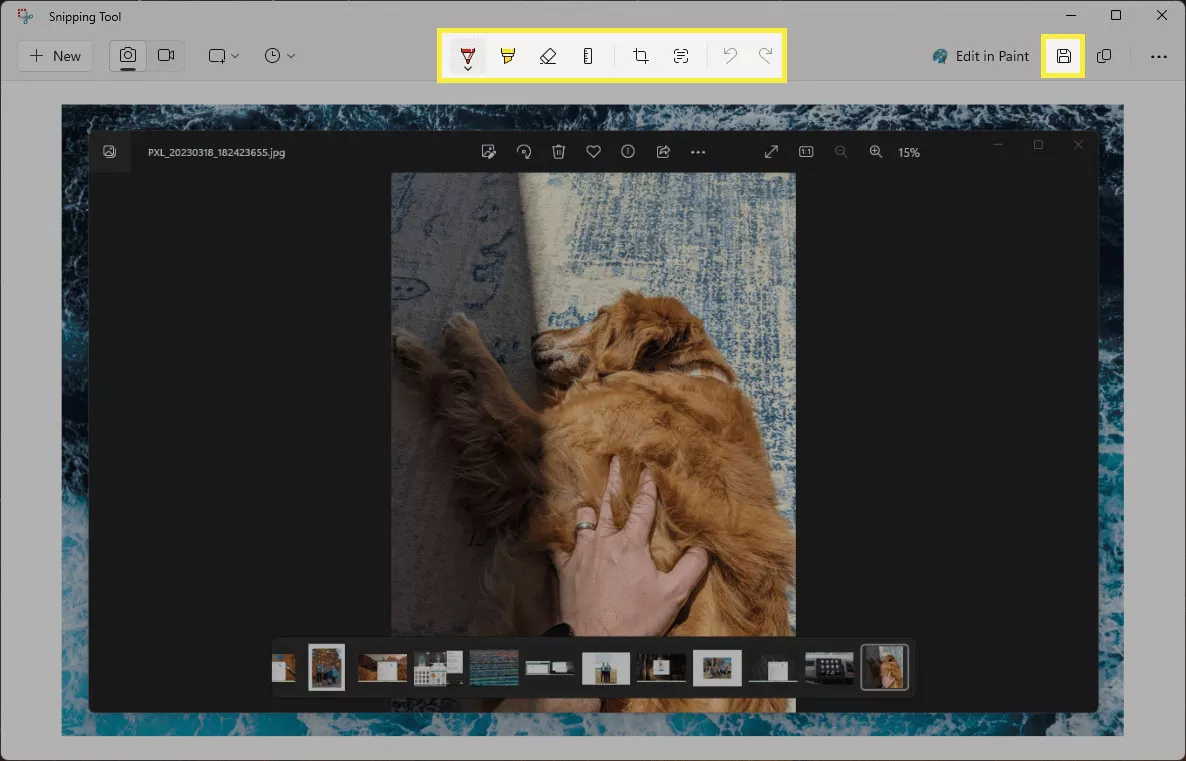
- Snipping Tool will open the screenshot in a new window. From here, you can use the tools up top to make notes and highlights, or copy the image to Paint, before you save the screenshot, which you can do from the floppy disk icon.
Tips:There are also third-party screenshot apps for Windows that offer more editing options.


