If you take a lot of screenshots on a Mac, you might end up with a cluttered desktop. This is because Macs automatically save your screenshots on the desktop. They are also saved as PNG files instead of the more widely used JPEG format. If you want to know how to change where screenshots are saved on a Mac, and the format they are saved in, just follow the steps below:
Where Do Screenshots Go on a Mac?
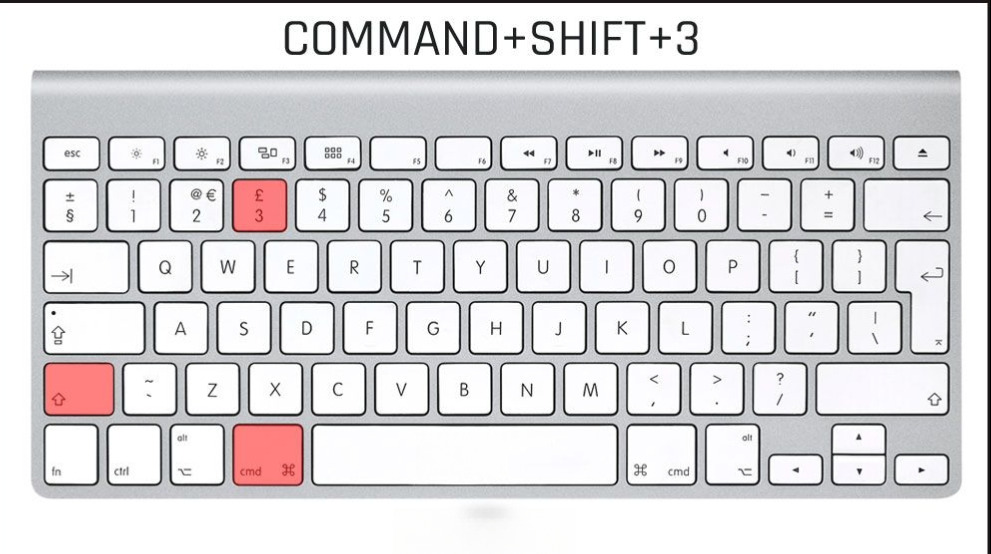
When you use keyboard shortcuts like Command + Shift + 3, your screenshots are automatically saved to the desktop. You can also right-click the floating thumbnail, which lets you save the screenshot to Documents or Clipboard.
How to Change Where Screenshots are Saved on a Mac
There are two ways to change the default screenshot save directory on a Mac, depending on your operating system. The easier way is through the Screenshot app in macOS Mojave. For mac OS High Sierra or earlier, you have to use Terminal, an app for entering command prompts to control your Mac. Below are the steps for each operating system.
How to Change Where Screenshots are Saved in macOS Mojave or Later
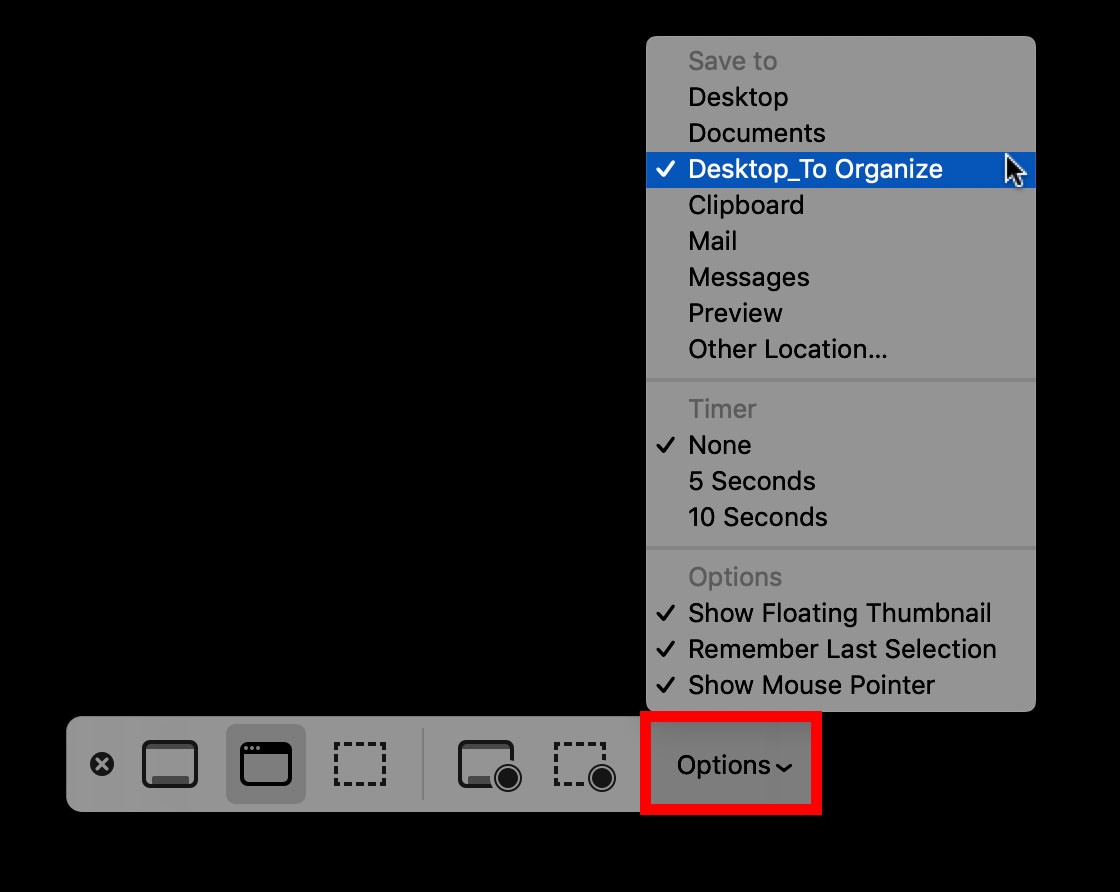
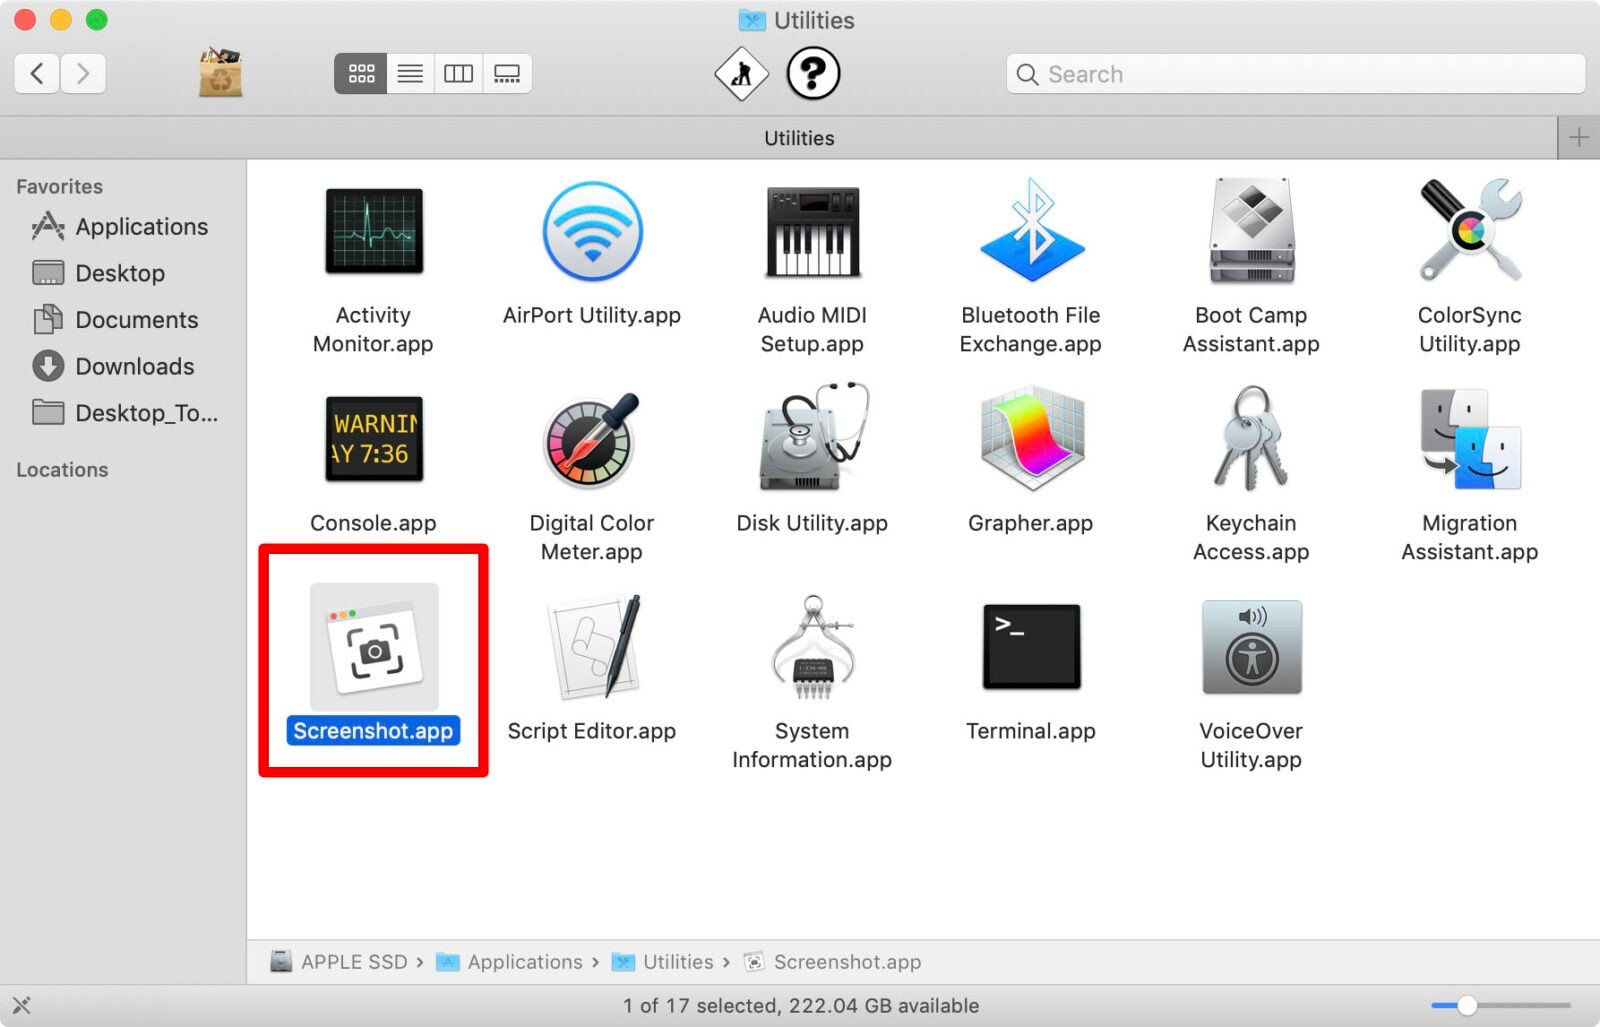
- Go to the Utilities folder and open the Screenshot app. You can also open the Screenshot app by pressing Command + Shift + 5.
- Click Options.The top tile of the menu will show your Save to options:
- Desktop – This is the default setting which saves the screenshot with the following time format: Screen Shot [date] at [time].
- Documents – This will save the screenshot to your Documents folder with the time and date as the file name.
- Clipboard – This will allow you to paste the screenshot to another app which can edit or view images.
- Mail – This lets you compose a new email in the Mail app with the screenshot attached.
- Messages – This will attach the screenshot to a message which you can send to a contact.
- Preview – This will launch Preview, a photo editing app. Your Mac will temporarily name the image file as Untitled until you change it to a different file name.
- Other Location – This will allow you to navigate outside of the locations previously listed to a folder of your choice. You can save to an existing folder or create a new one.
- Choose a Save To option. Your Mac will remember the last one you have selected and will apply this to subsequent screenshots.